GSCC Lesson 17
Past Lessons Summary and Links
If you are new to this series, here’s the links to past lessons:
We had covered all the family chords and their siblings in key of C and G Major:
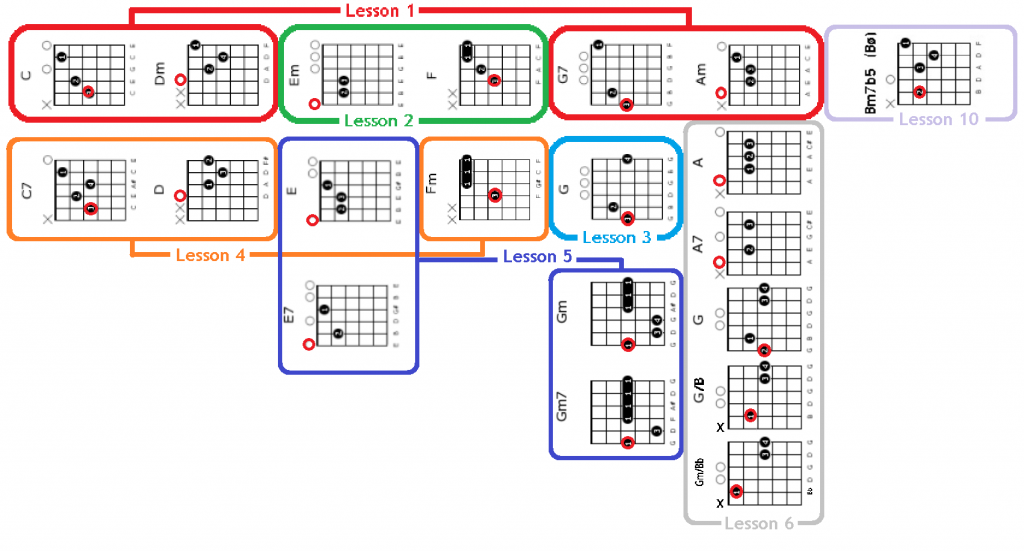
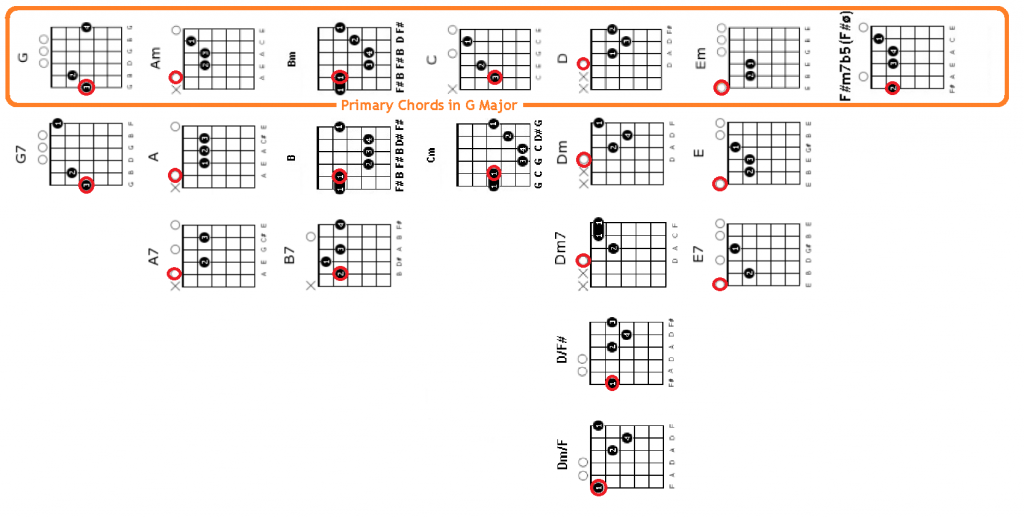
Key of C major and G major are common keys used by guitarist to play sing-along guitar.
We also looked at the guitarist best friend – CAPO , and it’s application.
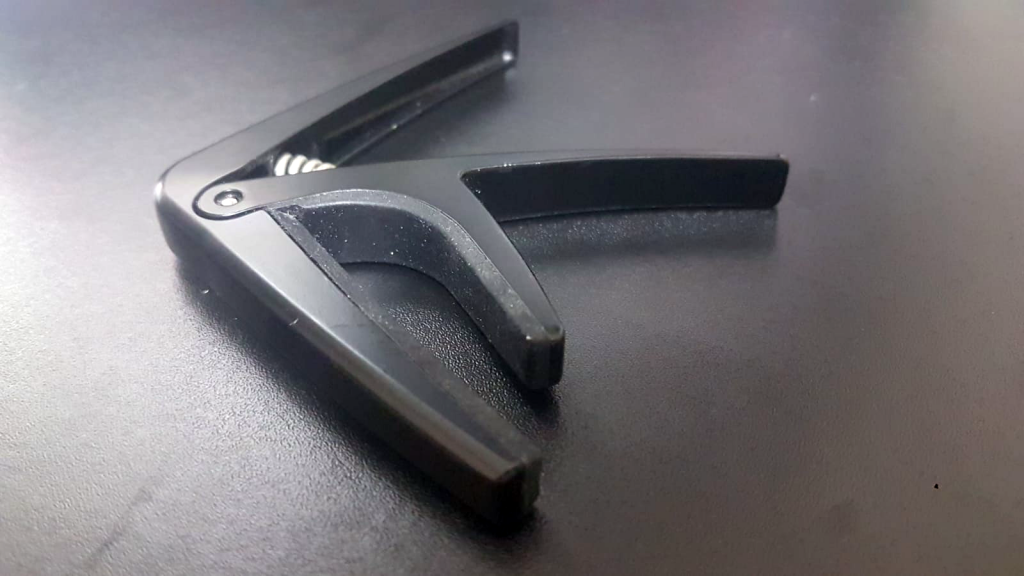
When we use the CAPO in conjunction with chords from C and G keys above , we are able to play almost every pop songs we wanted to play.
We have also looked at some basic strumming patterns:
| 1 | One strum per beat |
| 2 | Up-stroke strumming |
| 3 | Strumming lightly on first few strings |
| 4 | 16 beat strum |
| 5 | Campfire Strum |
| 6 | “Chuck” Strum |
| 7 | 3/4 Strum |
| 8 | 6/8 Strum |
And we had explored some basic pluckings.
| 1 | 8 beat pluck #1 |
| 2 | Double string pluck |
| 3 | 3/4 Pluck |
| 4 | “Alternate Bass” Pluck |
| 5 | 6/8 Pluck |
| 6 | Slap Rhythm |
And of course, we had fun learning all these songs !! They are specially produced “Karaoke for Guitar” videos (only vocal and metronome count) for you to practice your strumming / plucking:
Last week, we looked at one of the most important concept in guitar playing, “CAGED” system.
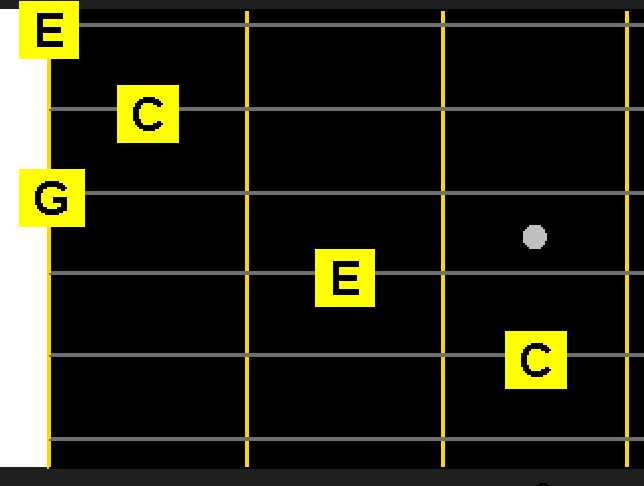
It is a system based on “C” chord, “A” chord, “G” chord, “E” chord and “D” chord, thus C-A-G-E-D 😉
| C | A | G | E | D |
 | 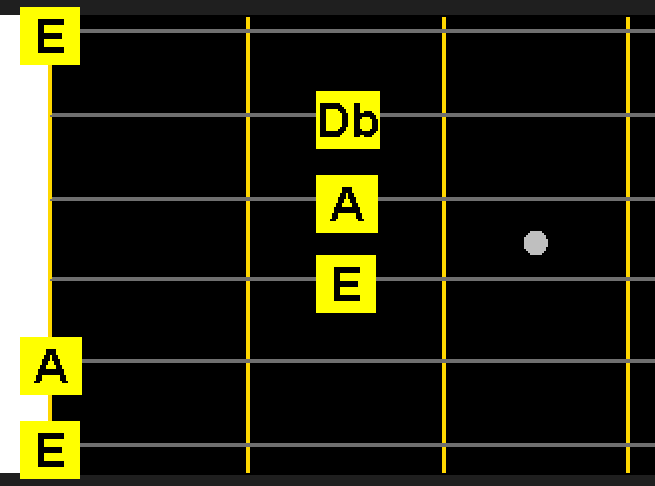 | 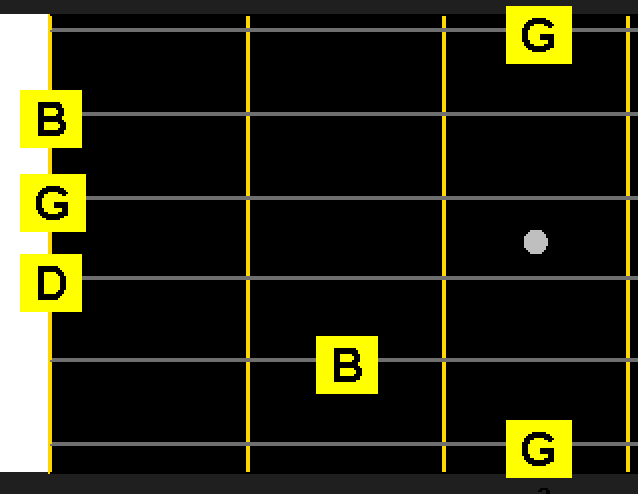 | 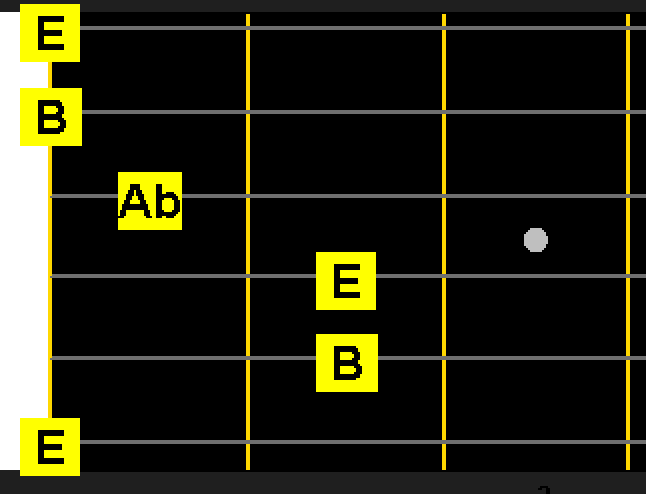 | 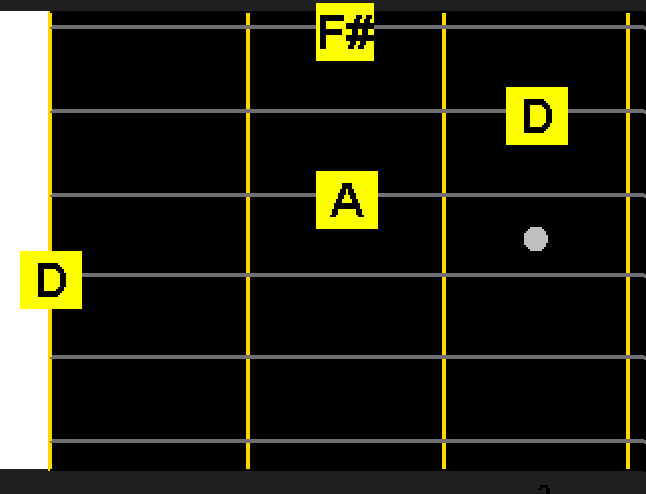 |
And how to link CAGED system to notes:
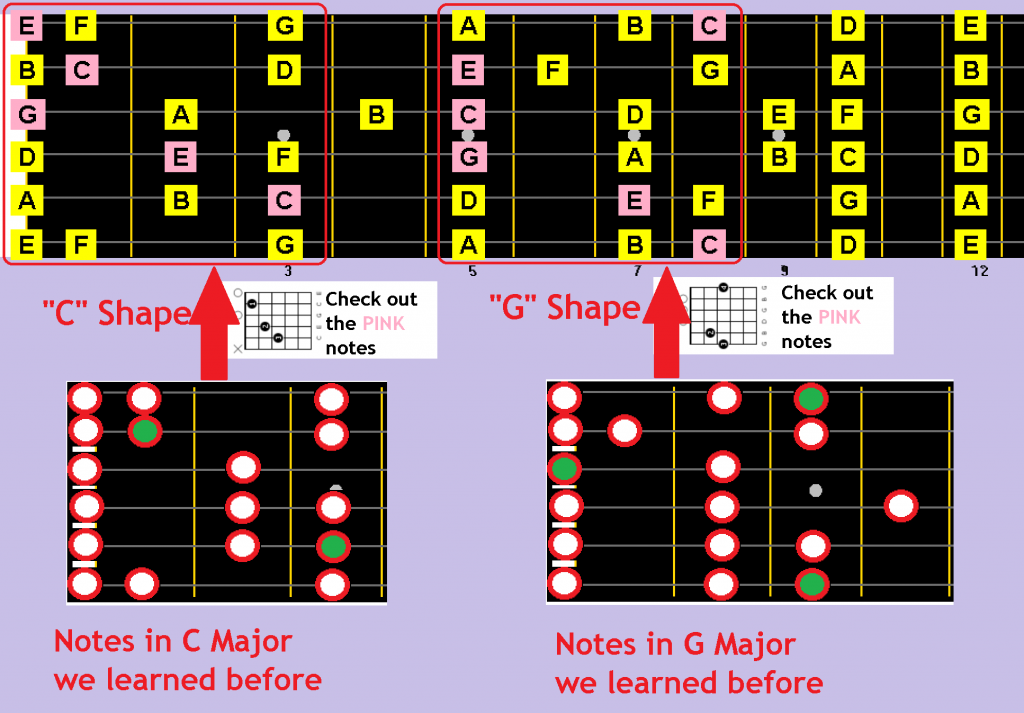
We also used what we learned to solve the wrong octave issues of the previous 2 songs.
Click here to ask a question …
How about minor and 7 chords? Can you move them across guitar fretboard as well?
Last week we looked at the “CAGED” system , which we can move all the major chords across the fretboard to “create” new chords.
Can we do the same things to other chords we learned so far?
YES!!! In fact , we can move any chords. As long as we can barred the chords (use index finger to function as a capo), we can move them! Thus, they are called barred chords.
Barring Minor Chords
Let’s start by looking at Am chord:

Let’s use our index finger as “capo” abd barred the chord, move it up one fret:

Up another fret:

Another:

We can keep doing it up the fretboard and create more chords.
Notice that, this chord shape is the variation of the A chord shape, so they are referred as “A” shape.
Next , let’s try another important minor chord shape we already know, Em:

This is similar to the “E” shape chord we seen last week.
Let’s use our index finger to bar it and move up one fret:

We got a Fm chord.
Let’s move up one more fret:

And , another:

There’s another minor chord shape we had learned, Dm:

This is the variation of “D” shape chord.
Let’s do the same thing, barred it and move up one fret:

Let’s move up another fret:

And another:

So, we had looked at the 3 different minor chord shapes we know and barring them across the neck.
Click here to ask a question …
Barring 7 chords (dominant 7 chords)
Let’s look at the three 7 chords we know and bare them across the fretboard.
First, E7:

Again, this is the variation of the “E” shape chord.
Let’s bare it and move it up the neck:

Move it up another fret:

And another:

Let’s examine another 7 chord we know, A7:

Do the same thing:


Finally, the last 7 chord, D7:

Do the same thing, bared and move across the fretboard:


So, that was barring the 7 chords we know.
Click here to ask a question …
Why are we learning those barred chords?
1. If we encountered a chord we never learned before, we can work out the chord ourselves.
Say, C#m:
First, we play a Am chord

Then we calculate the steps and move the Am shape to C#m

2.If we play in a difficult keys, we know how to play those chords
In key of Eb – Eb Cm Ab Bb7


3.For Chord Melody Guitar playing, we can find the chord which is closest to the melody
Let’s say the melody note is A

The chord is Dm

That is too far
We can use this Dm! Problem solved!

Another example. If the melody is C

The chord is F

That again is too far.
We can use this instead

Click here to ask a question …
Is there a faster way to build the chords?
Until now, we build the chord by shifting the chords fret by fret.
Is there a faster way to do it?
Here’s a faster way:
- Find the bass note of the chord
- Locate it on the fretboard
- Build the chord on top of it
Let’s say we are gonna figure out how to play a Eb major
Here’s the Eb note:

Use that as the bass note of the chord. We know that bass note is the lowest note of a chord. So we can build a chord on top of this bass note.
Let’s put a “C” shape chord (from the “CAGED” system we learned before) on top of this bass note:

Yeah! We got a Eb major chord just like that!!
We can also use the “A” shape from the “CAGED” system:

You can decide which version you wanna play based on the situation.
Let’s try another example, say Bb chord.
First, locate Bb note

Then again, we use that note as the bass note of the chord, and build chord on top of it.
Let’s put a “G” shape chord on top of it:

Let’s use another shape, “E” shape:

Click here to ask a question …
Yeah cool! But we still need to count the bass note fret by fret.. FRET NOT (pun not intended)
From the above example, we still need to count the bass note fret by fret.
Here’s another tips. We can establish a few landmark on the fretboard.
Here’s the notes on the 1st position we already know

And we know that at one octave higher, the notes name repeat itself, but one octave higher. In guitar case, 12 frets above

If we need to find the D note, we have 2 options now:

For this case, we can see the calculating from the high E note is the faster way to get the “D” note.
Thus, the more landmark we can memorize the better . Of course, if you can memorize all notes on the fretboard will be the best, but that will be a nightmare for now.
If you wish to go a bit further, here’s a few more suggested landmark you can memorize:


Here’s the visualization on 5th and 6th strings. Most bass notes are from this 2 strings.

Let’s take a look at the example of locating notes on 5th strings with this new landmark method:
Let’s locate Eb note on 5th string

And G note on 5th string

Click here to ask a question …
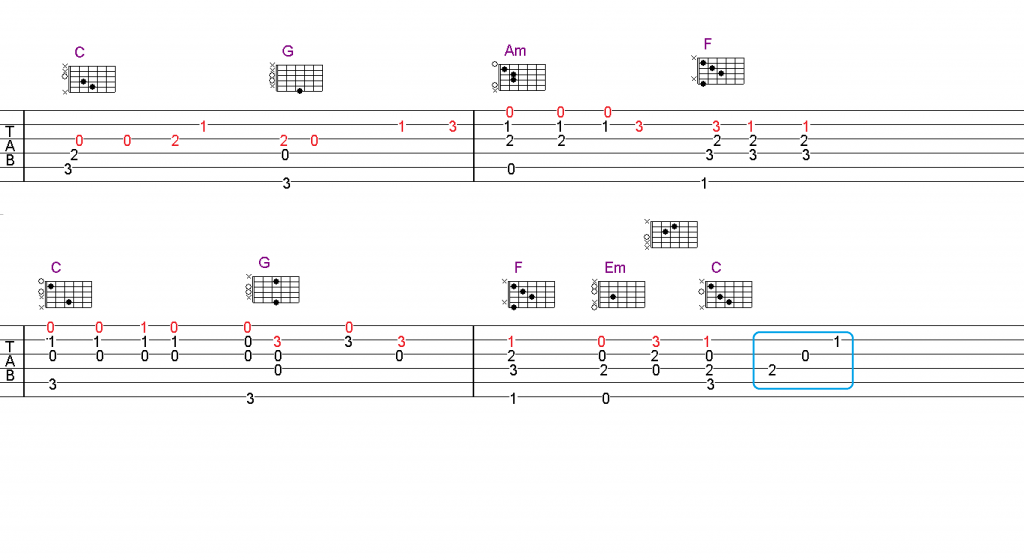
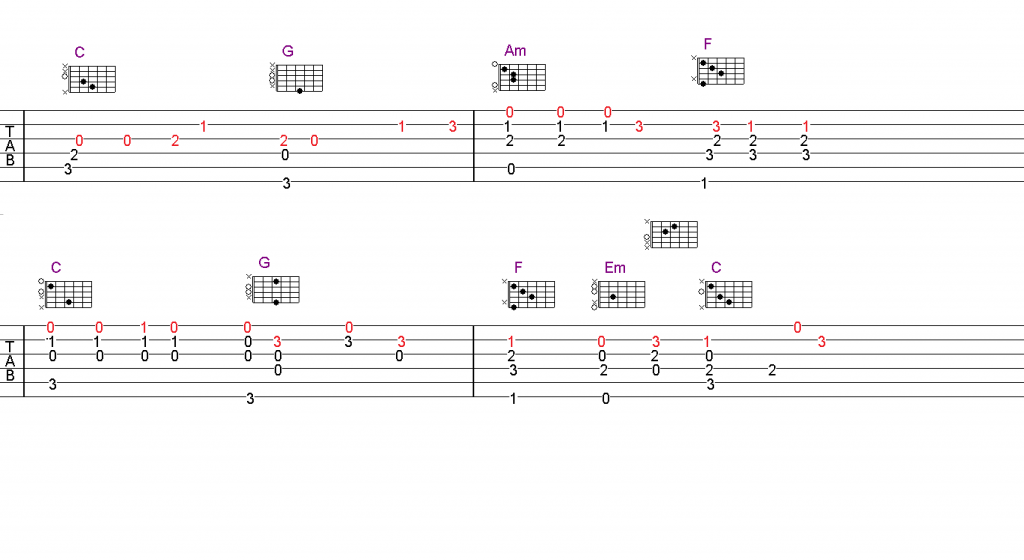
Let’s try to play another song on Chord Melody Guitar
Let’s try it on a classic Beatles’ song : “Let It Be”
Again, we will go through the following steps:
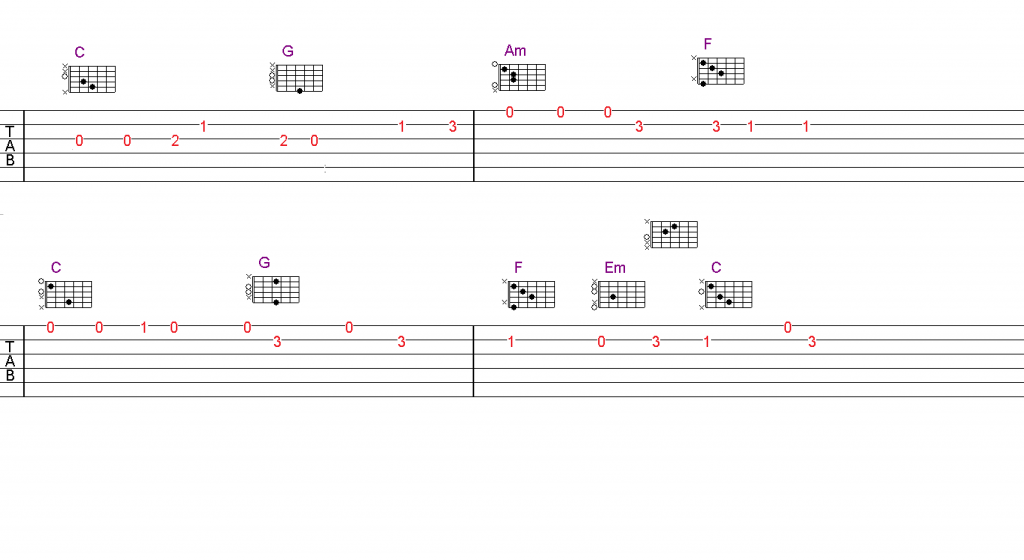
Step 1: Play the melody
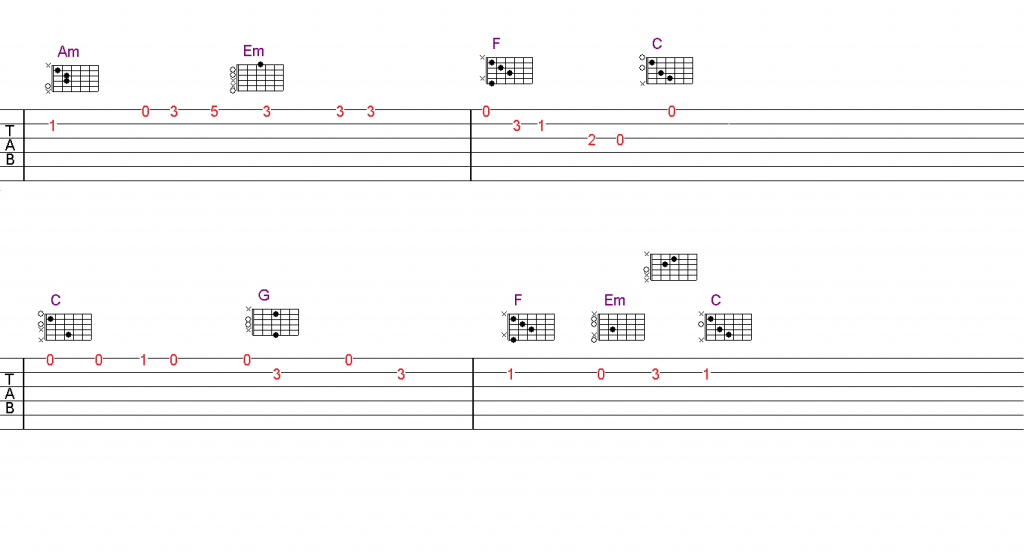
Step 2: Find out the chords
Step 3: Combine the melody and the chords
Step 4: Add in the accompaniment
Click here to ask a question …
Step 1: Play the melody
Let’s learn to play chord melody guitar of the song “Let It Be”.
First, learn and play the melody:

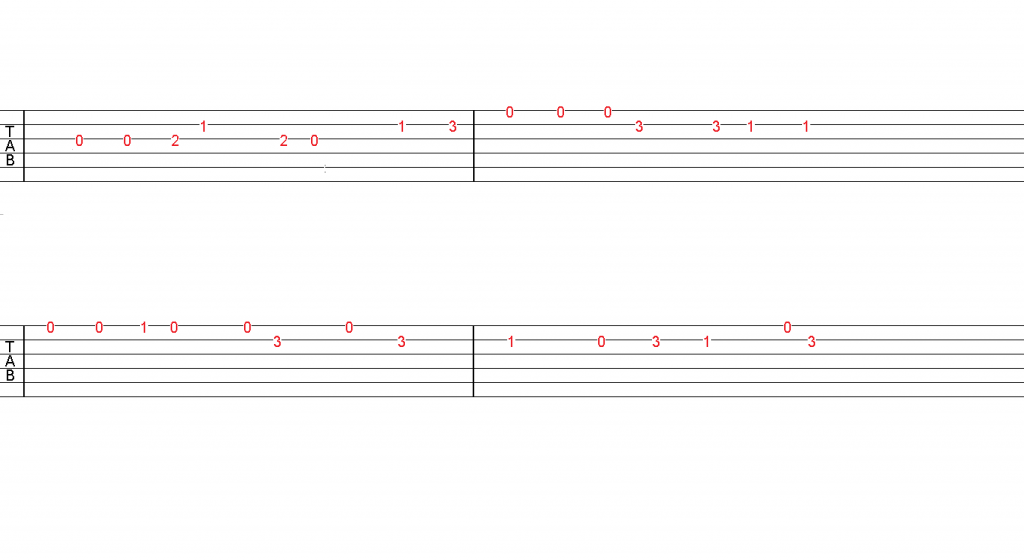
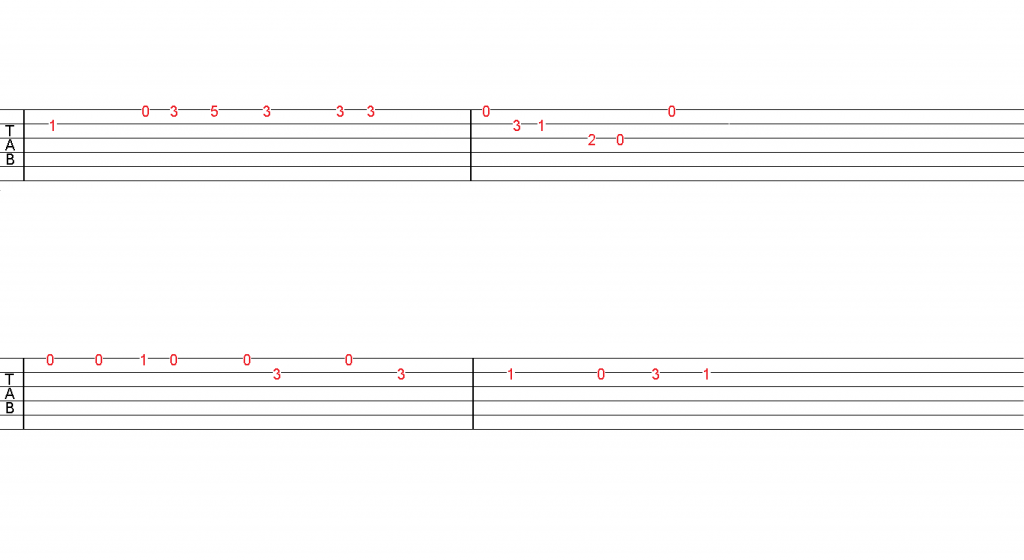
Click here to ask a question …
Step 2: Find out the chords
You can either get them online or use your ears!!
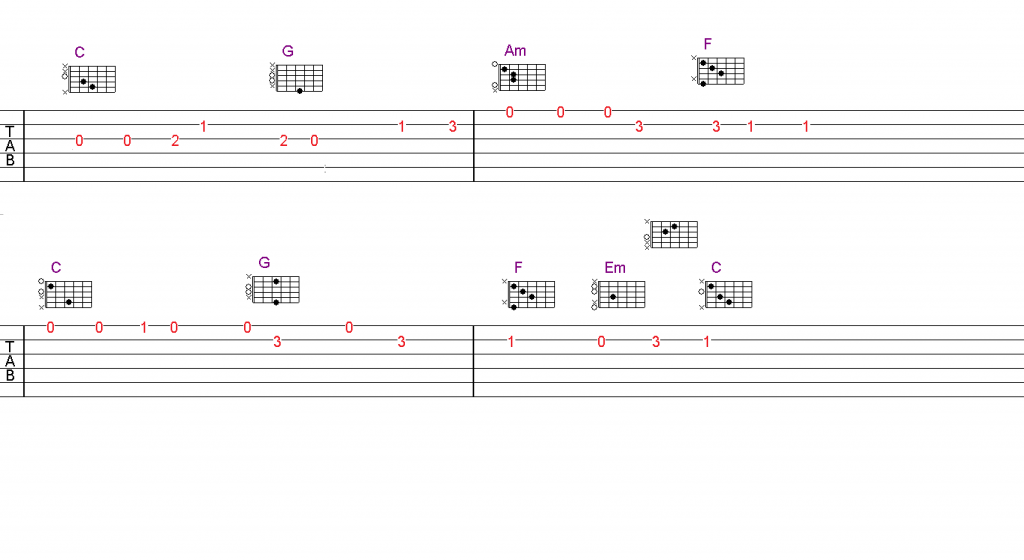
Click here to ask a question …
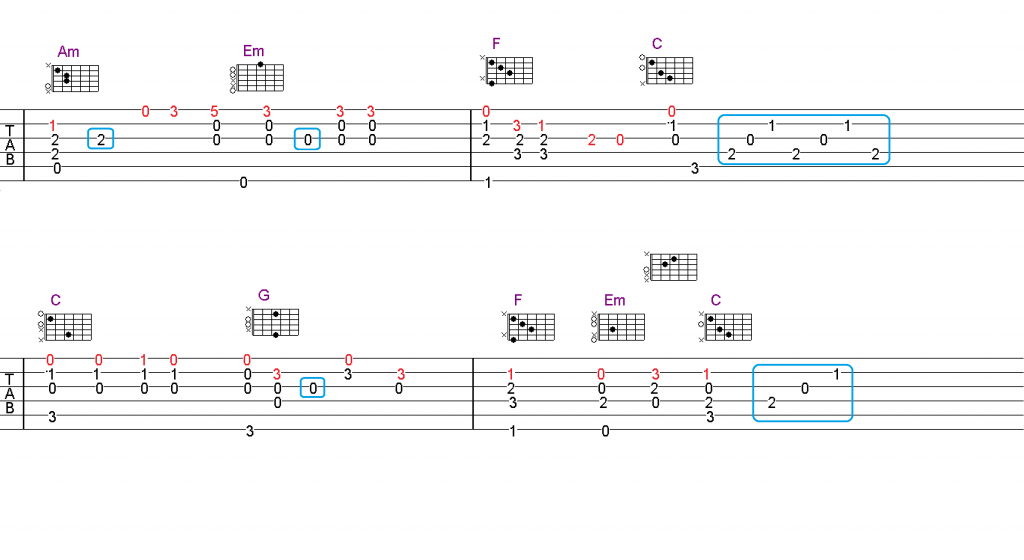
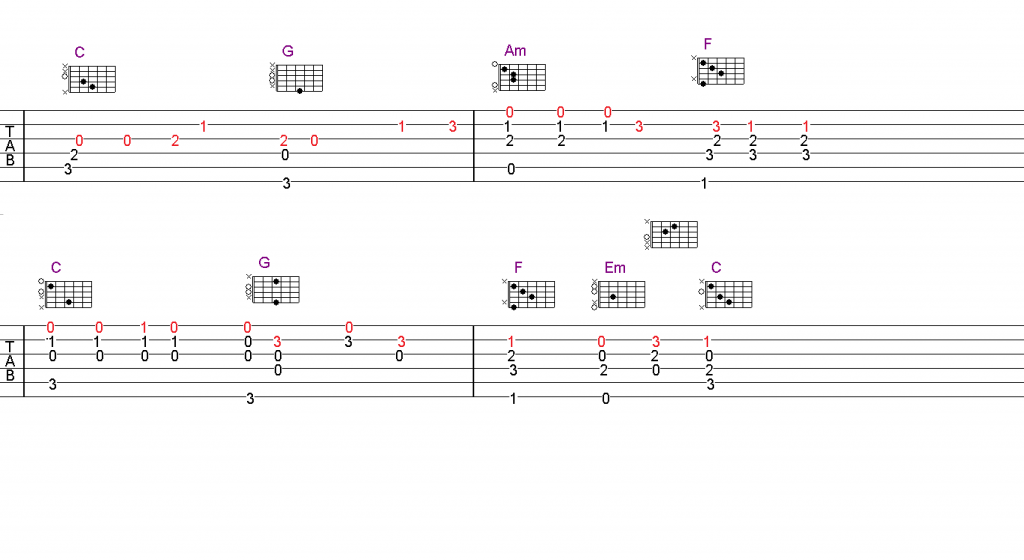
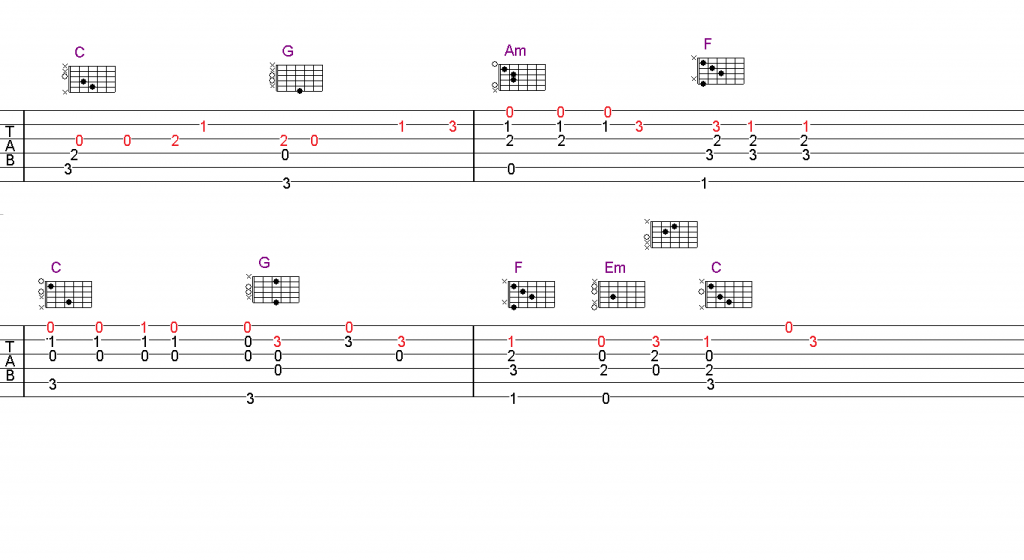
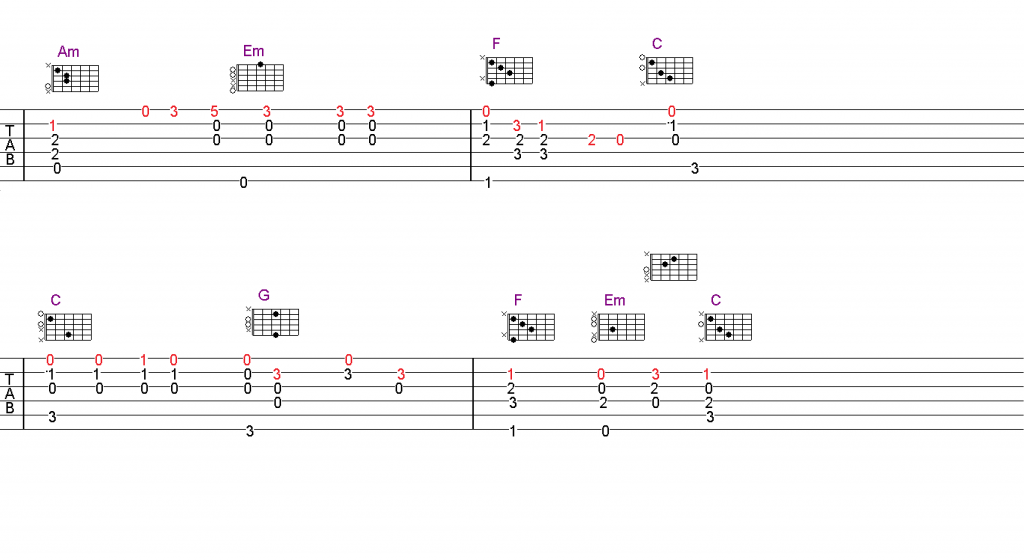
Step 3: Combine The Melody And The Chords
Let’s combine the melody and the chords.
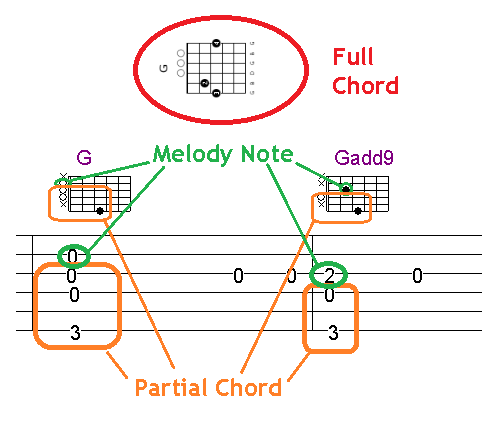
As we mentioned in last week lesson, the trick is to play the chords “below” the melody notes. This means we are gonna play part of the chords.
Click here to ask a question …
Step 4: Add In The Accompaniment
Yeah! We have the melody and the chords!!
Let’s make it more complete by filling in the gap between the melody.
We can fill in the gap by playing the plucking accompaniment just like we are accompanying someone to sing:
